
Haverford Roofing specializes in roof leak repair in Haverford, PA, serving surrounding cities including Uwchlan, Yeadon, West Bradford, Upper Providence Township, Nether Providence. After 20+ years of chasing water through old houses, we know a leak is rarely where the stain is, so we find the opening before we price the fix.
Every leak call includes the attic as well as the roof. Water that gets past a shingle or a flashing usually runs along the sheathing or down a rafter before it drips, and the wet trail on the underside of the deck leads us back to the real source instead of to the shingles that happen to sit above your ceiling.
Once we know where the water enters, you get a straight answer about the fix. Most leaks come from one failed detail and are a repair, not a reason to replace the roof, and we say that before any larger work is mentioned.
Finding the Source of a Roof Leak
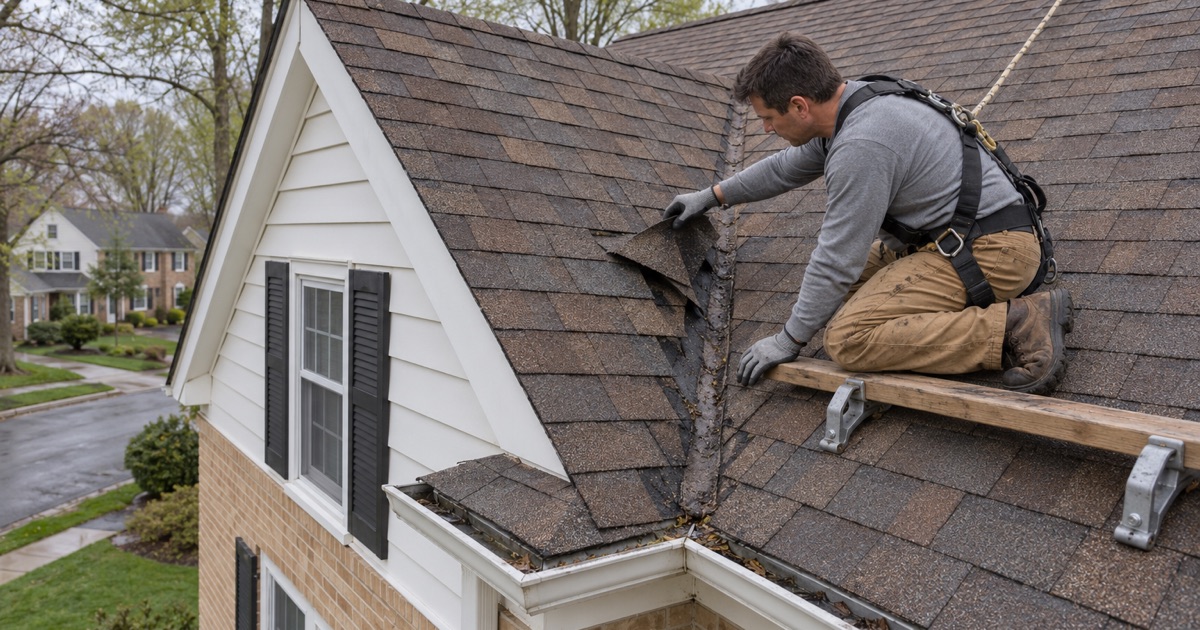
Reading the Attic First
The attic tells us more than the roof surface does. We look for dark streaks on the sheathing, water lines on rafters, rusted nail tips poking through the deck and insulation that has been flattened or stained, then follow those marks uphill.
The highest point of the wet trail is usually close to the opening, and that is where we go on the roof. This step is what separates a lasting leak repair from a patch that moves the drip a few feet to one side.
Roof Leak, Plumbing or Condensation
Not every wet ceiling is a roof problem. A plumbing vent seal, a bath fan duct dumping moist air into the attic, or condensation on the cold underside of the deck in winter can all look like a leak from below.
We check for those causes alongside the roof, because the fix is different for each. Condensation, for example, is solved with ventilation and air sealing, and no amount of new flashing will stop it.
Water Testing When the Trail Is Unclear
Some leaks only show in heavy, wind-driven rain and leave little evidence between storms. In those cases we can run water over a suspect area in controlled sections, starting low and working up, while someone watches from the attic.
Testing section by section shows exactly which detail is letting water in. It takes longer than guessing, but it means paying for the right repair once.
The Most Common Leak Sources We Repair
Chimney Flashing Leaks
Chimneys are the most common leak source on older houses. The step flashing along the sides, the counter flashing set into the mortar and the apron or cricket at the front and back all have to work together, and any one failing lets water down the face of the brick.
We rebuild failed chimney flashing with new step pieces and counter flashing cut into a reglet in the mortar, and add a cricket behind wide chimneys. Caulking over old flashing may slow a leak, but it does not fix it.
Valleys and Roof-to-Wall Joints
Valleys carry water from two slopes at once, so worn shingles or tired metal there leak quickly. Where a roof meets a wall, missing step flashing or a missing kick-out at the end of the eave sends water into the wall instead of the gutter.
We replace worn valley material and rebuild step and kick-out flashing at walls and dormers. On stucco and stone houses, a missing kick-out often explains staining that has puzzled owners for years.
Skylights, Vents and Pipe Boots
Skylights leak at the corners of their flashing, rubber pipe boots crack in the sun, and roof vents rust or lose fasteners. Each creates a small opening that lets in a surprising amount of water over a season.
We replace cracked boots with rubber or lead flashing boots, reflash skylights with the correct kit and re-secure or replace vents. If a skylight’s glass seal has failed, we tell you, because flashing work will not stop that leak.
Ice Dam Leaks Along the Eaves
When heat from the house melts snow on the upper roof, the water refreezes at the cold eaves and backs up under the shingles. These leaks often show as stains on exterior walls or above windows during thaws.
We repair the damaged area with self-adhering ice and water barrier under the shingles at the eave, as the code expects under IRC R905.1.2. We also check insulation and ventilation in the attic, since that is what stops the dam from forming again.
Box Gutter and Cornice Leaks
Older houses often have box gutters built into the eave, lined with metal and hidden behind trim. When the lining cracks or its seams open, water goes straight into the cornice and wall framing.
We open the box, assess the wood behind it and reline it. If the framing has rotted, we explain the options and their costs before any work starts, including converting to a hung gutter.
Flat Roof Leaks Over Additions and Porches
Low-slope roofs over rear additions, porches and garages leak most often where the membrane turns up against the house wall, at open seams, and around drains that have clogged. Standing water after a storm makes every one of those weak points worse.
We repair the seam or flashing with material that bonds to the existing modified bitumen, EPDM or TPO, and clear or correct the drainage. If a section keeps ponding, we explain whether a repair will hold or whether that area needs rebuilding with better slope.
Emergency Leaks and Storm Damage
Temporary Repairs to Stop the Water
When water is coming in during a storm, the first priority is limiting the damage. We tarp the affected area and secure it against wind, then return for the permanent repair once the roof is dry.
The temporary repair and the permanent one are priced separately. Keep receipts for any emergency work, since insurers generally expect owners to take reasonable steps to prevent further damage.
Documenting Damage for Your Claim
We photograph storm damage on the roof and the leak path in the attic, and write a description of what failed. That record goes to you for your own claim with your insurer.
We will meet the adjuster on site when you ask, to show what we documented. We do not negotiate the claim or interpret your policy, because in Pennsylvania only a licensed public adjuster may do that on your behalf.
Our Step-by-Step Leak Repair Process
Step 1: Attic and Interior Check
We look at the stain, then go into the attic to read the water trail and mark the likely entry area. This also tells us whether the problem is a roof leak at all.
Step 2: Roof Inspection Above the Trail
On the roof we inspect the flashing, shingles and penetrations above the marked area. Where needed, we water-test in sections to confirm the source.
Step 3: Written Repair Scope
You receive a repair scope with photos and a price for fixing the source. If the roof has wider problems, we tell you, but we do not bundle them into the leak repair.
Step 4: Repair, Cleanup and Photos
We make the repair with proper flashing and matching materials, clean up the work area and sweep for nails. You get photos of the finished repair for your records.
- 20+ Years in Business
- Attic Checked on Every Leak
- Line-Item Written Scopes